Online Registration Guide
Whether you're tech savvy or hate computers, the registration process can be daunting - especially when missing a step means the difference between your account actually being created... or not! To save you from having to go through the process more than once, here is how things look at each step, so you'll know you've done it right. :)
START AT OUR WEBSITE
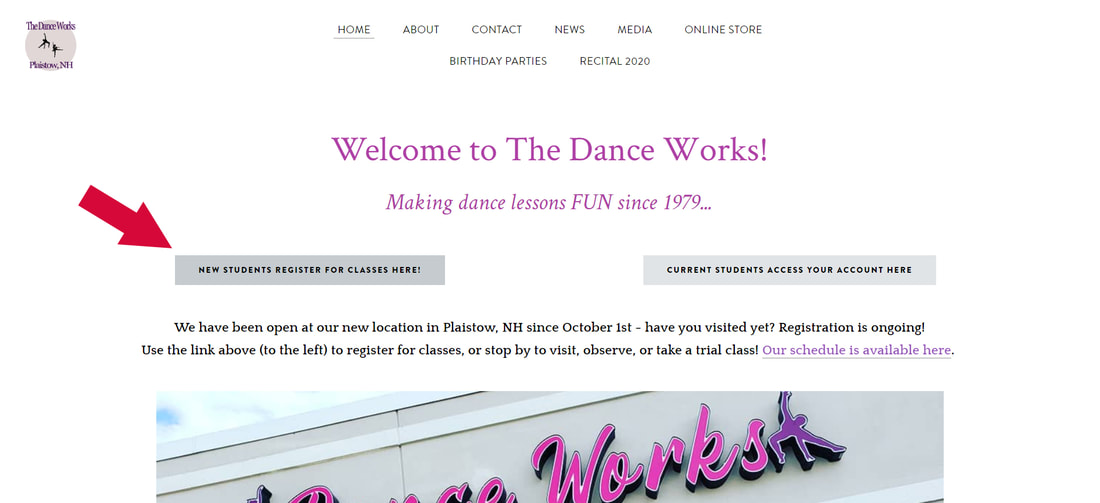
On the home page at TheDanceWorks.us, click on "New Students Register for Classes Here!" at the upper left:
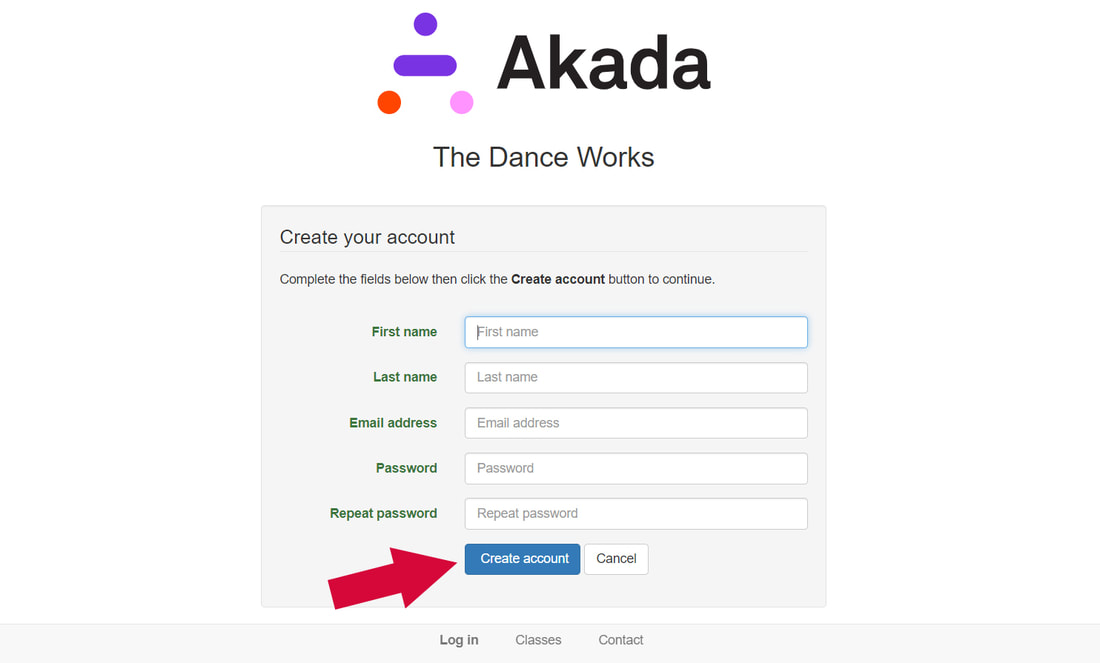
You'll be redirected to the Akada website (our dance software and online payments provider). Enter the information and click "Create Account":
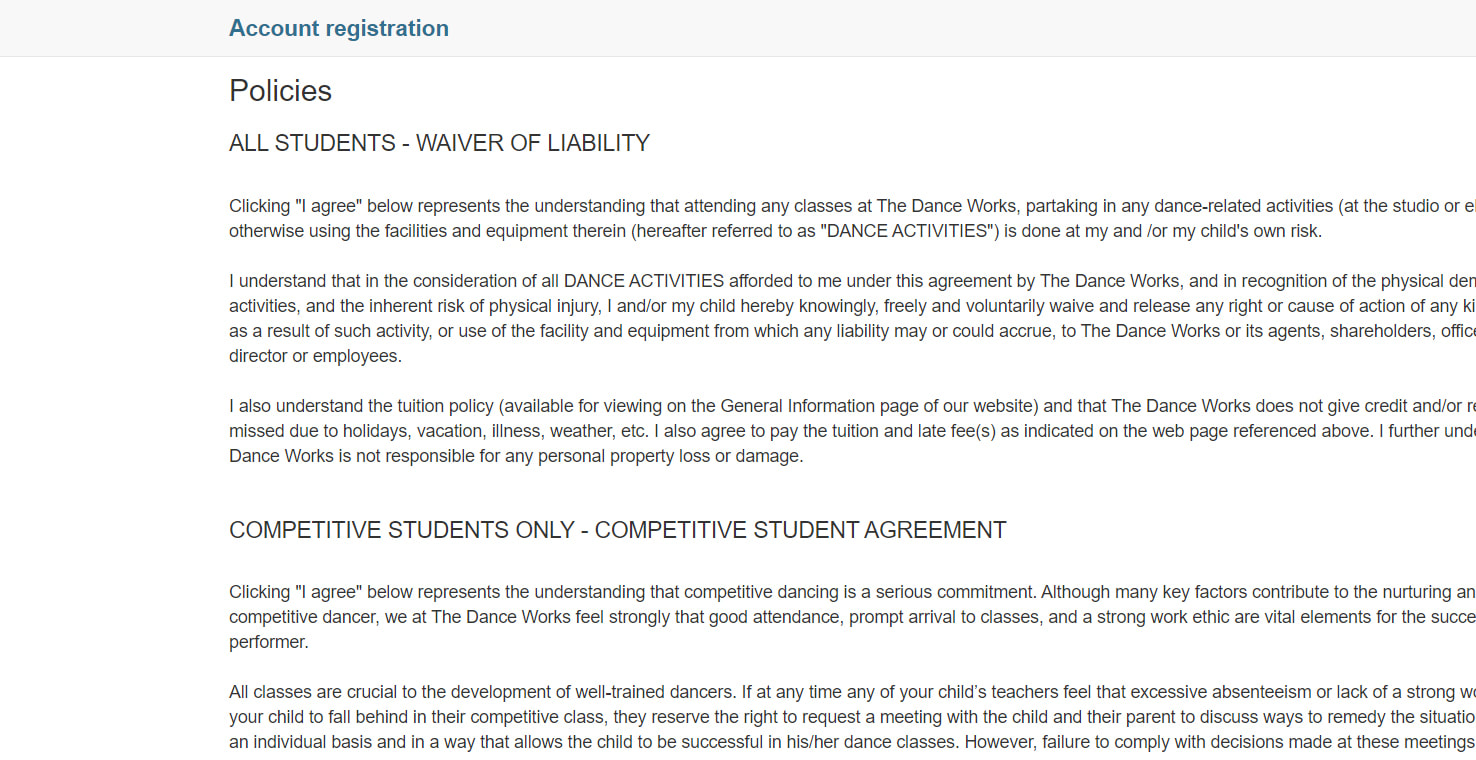
You should see the Waiver of Liability at the top - with additional agreements for competitive students and Company members:
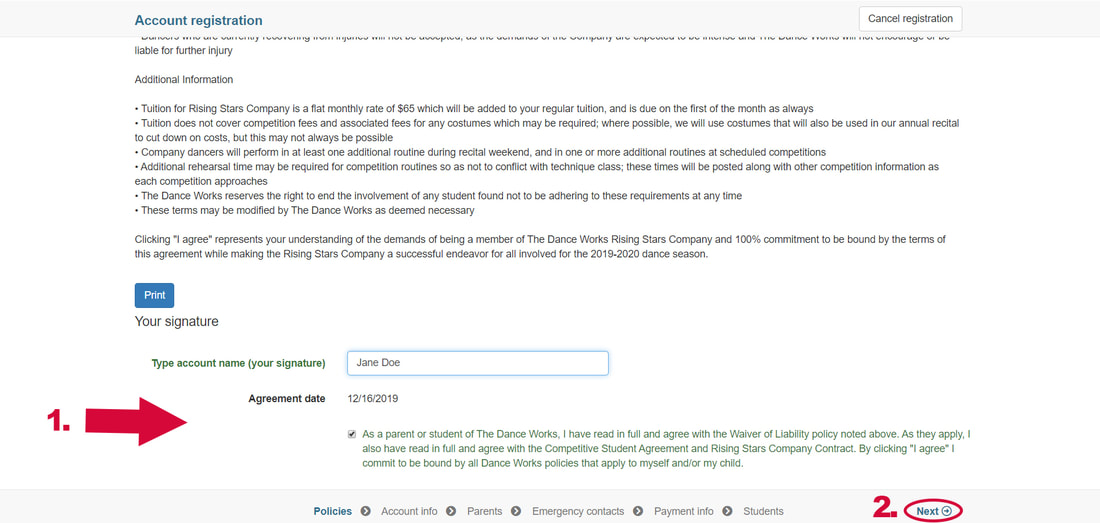
Please read all agreements that apply to you/your child, then scroll to the bottom to sign by typing in your name and checking the box (1). Then click the word "Next" in the lower right corner (2):
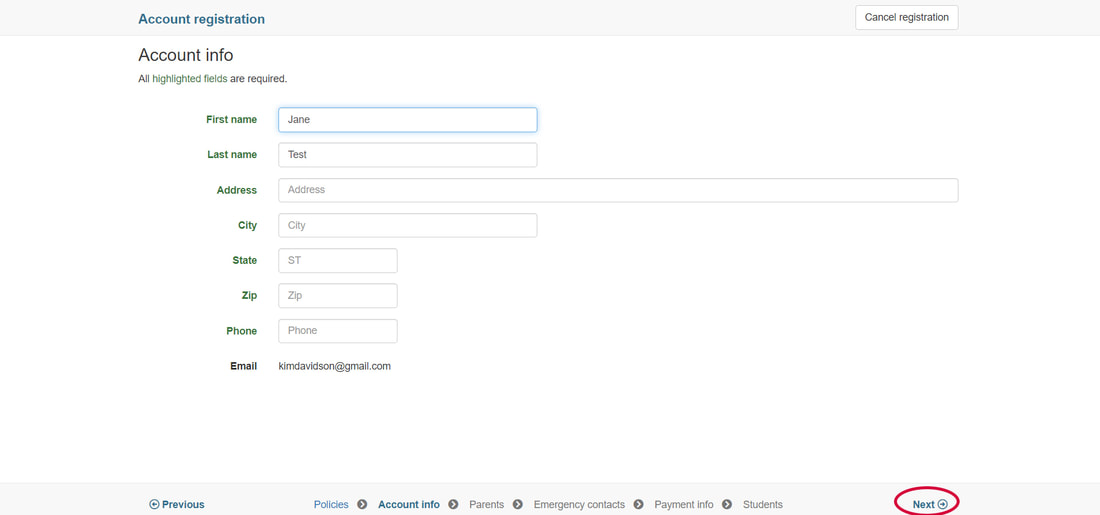
Fill out the Account info fields, as shown below. You should see your name and email already populated. The Account uses the name of the person registering the student and paying for classes - which may or may not be the same name as the parents. Click "Next" in the lower right corner when finished.
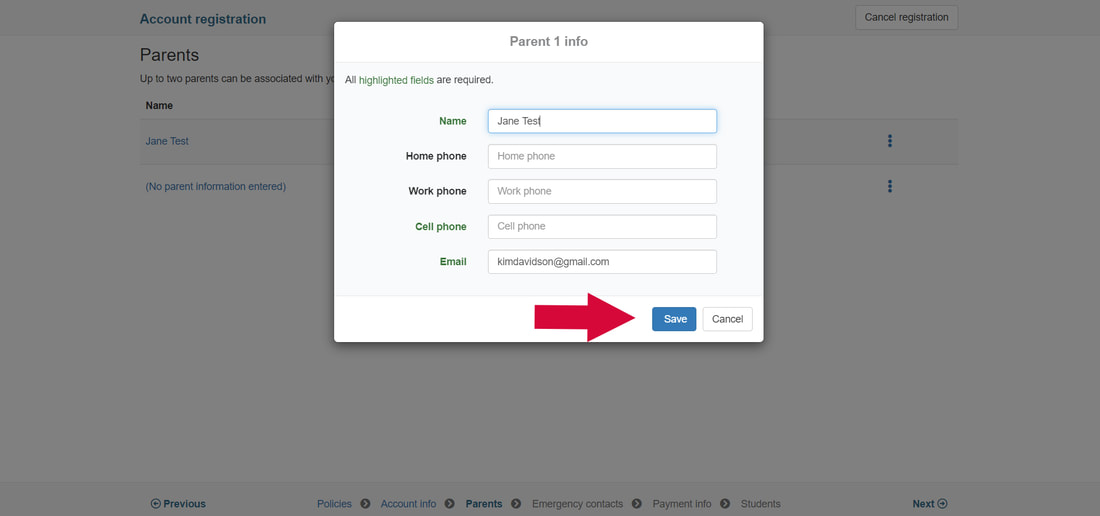
A pop-up for Parent 1 info will appear. Fill in the fields and click "Save":
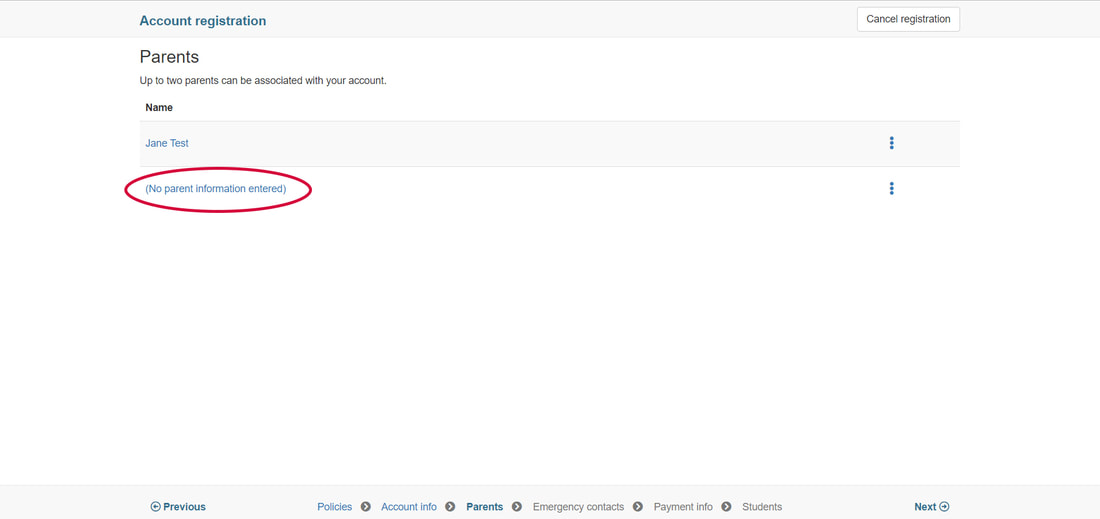
If you want to enter a second parent, click where it says "No parent information entered":
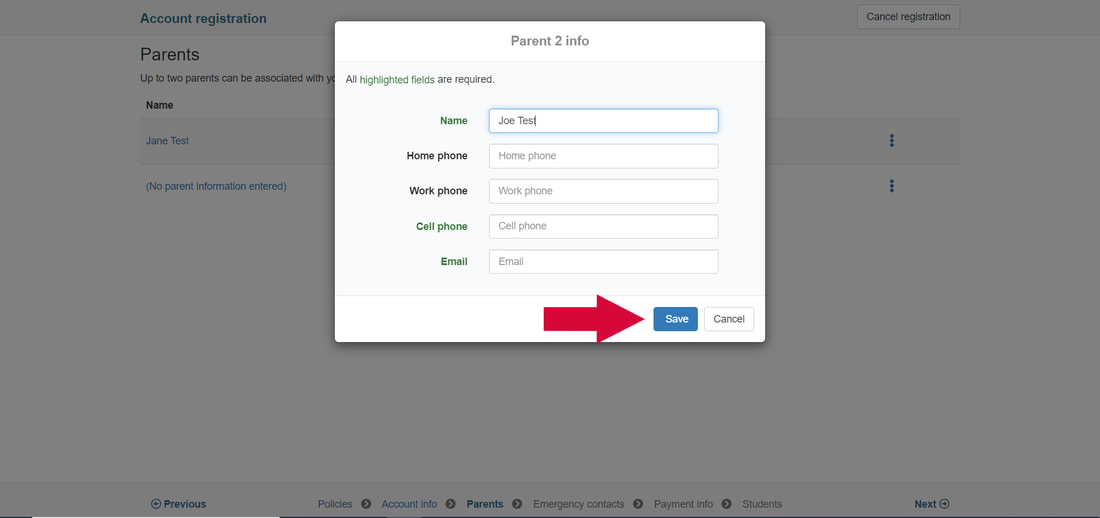
Fill in the fields for Parent 2 info, then click Save:
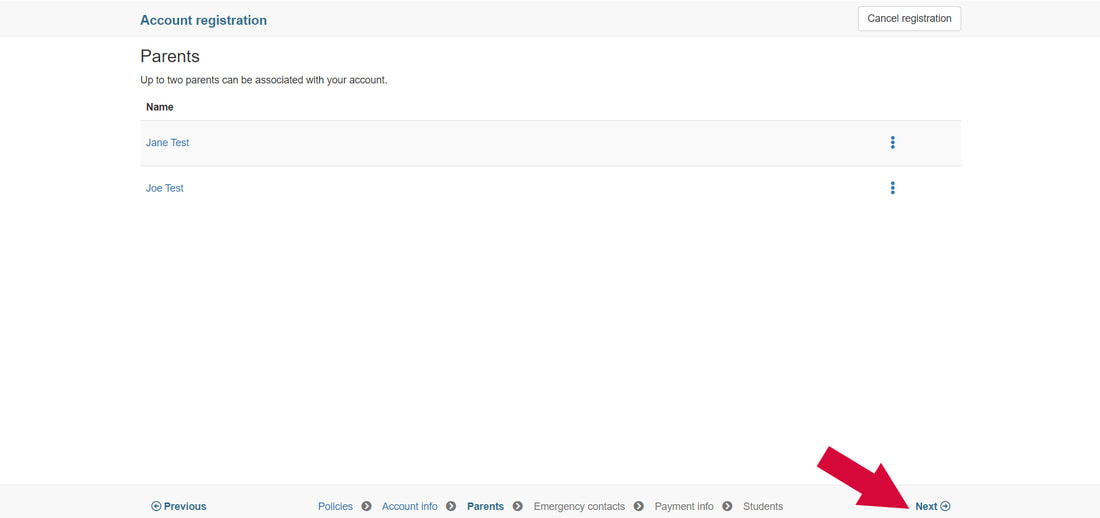
When both parents names are entered, click "Next" at the bottom right:
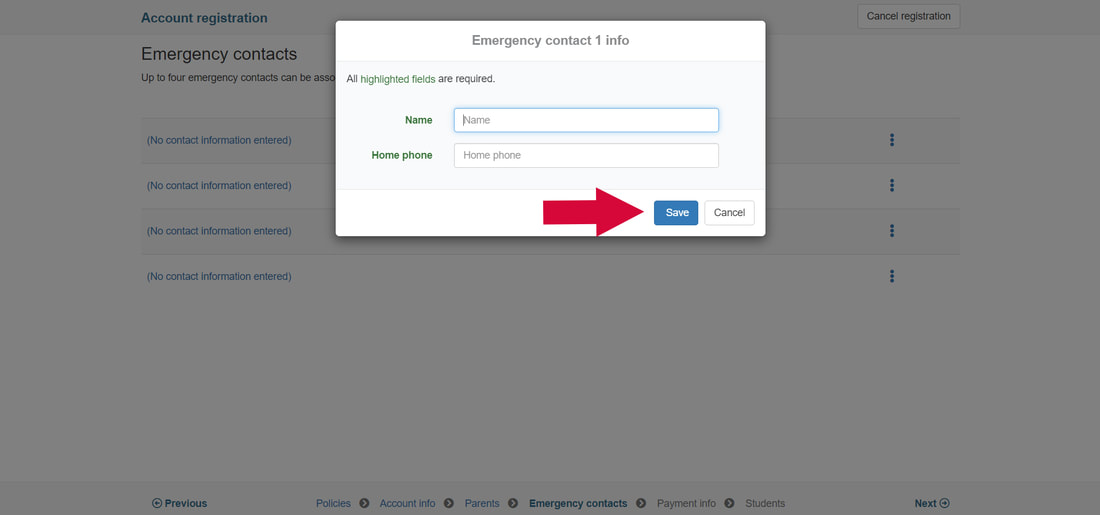
The Emergency contact 1 box will pop up. Enter the name of your chosen emergency contact and click "Save":
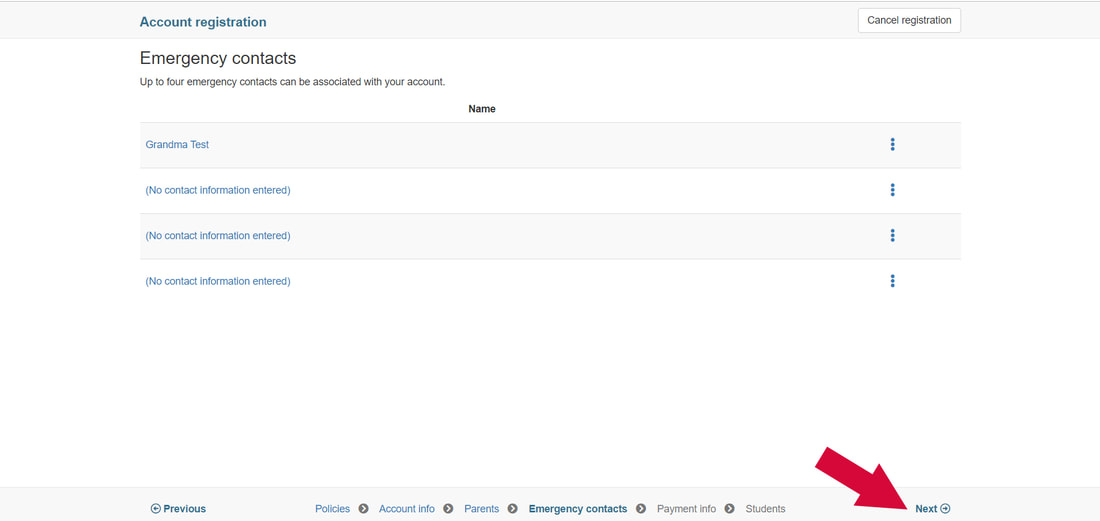
You may enter up to four (4) emergency contacts. Click on "No contact information entered" to pop up a new box, enter the information, and press "Save." When you are finished entering emergency contacts, press "Next."
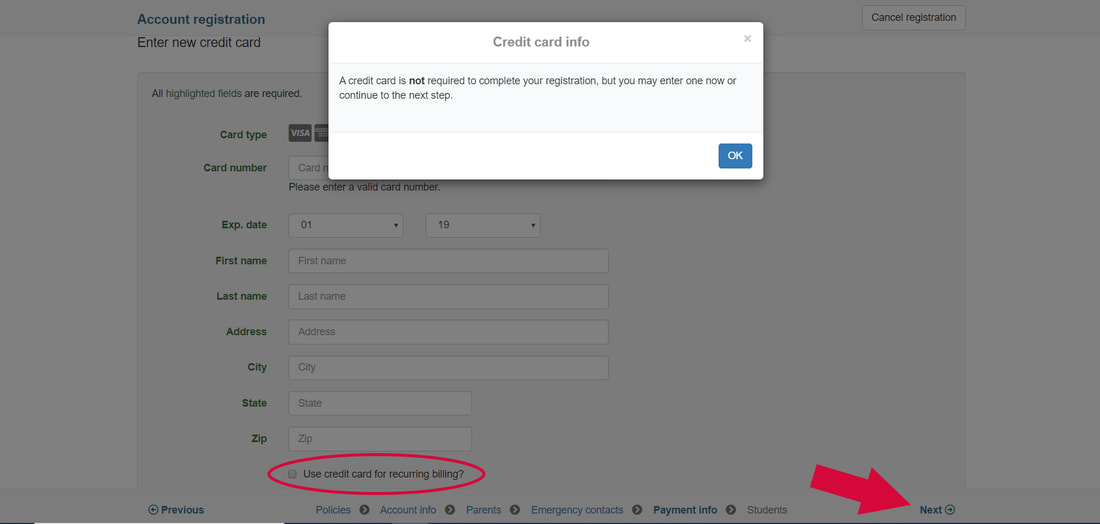
Next you have the option to enter your credit card information. THIS IS NOT REQUIRED, however, you may wish to have a card on file to make payments as you like. Otherwise you may pay with cash or a check at the office, or mail payments to the studio. (Please see the Rate & Payment Info section on our General Information page for more details.)
Click "OK" and fill out your credit/debit information. If you wish to have your tuition automatically paid by credit or debit each month, check the box next to "Use credit card for recurring billing?" If you don't wish to have a card on file, just leave the fields blank. In either case, click "Next" to move on to the next step.
Click "OK" and fill out your credit/debit information. If you wish to have your tuition automatically paid by credit or debit each month, check the box next to "Use credit card for recurring billing?" If you don't wish to have a card on file, just leave the fields blank. In either case, click "Next" to move on to the next step.
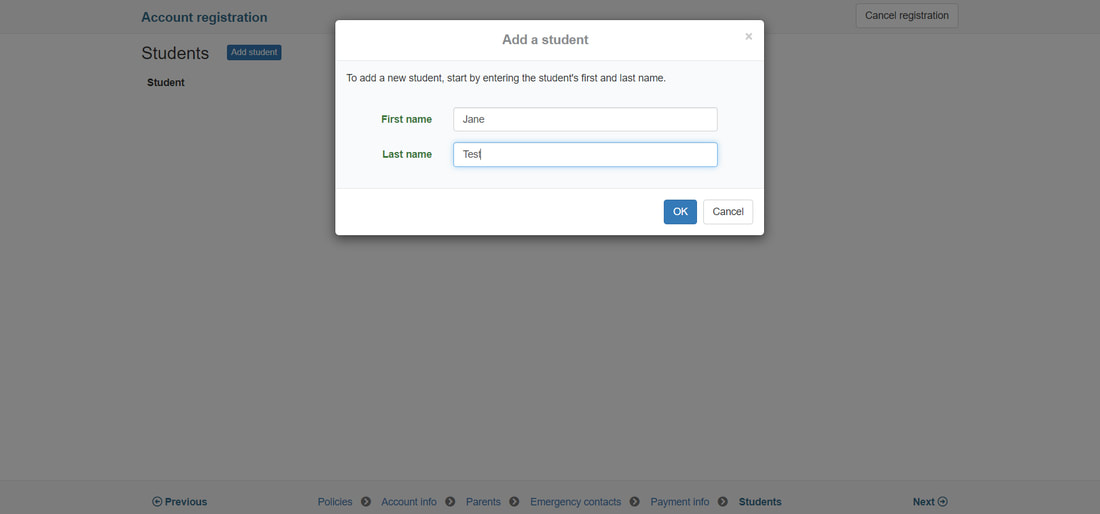
Now it's time to enter the student(s) associated with the account. If you are an adult student, you must enter your own name as a student here. Enter the first student's name and click "OK":
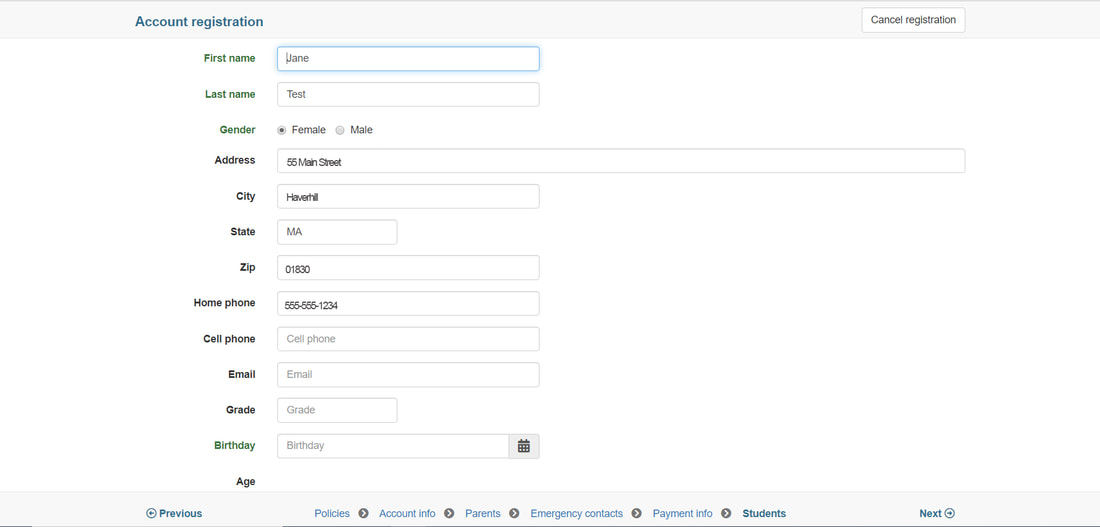
You will be brought to the Student Info page. Address and home phone will be pre-filled. If the student address differs from the account address, you may change it. When you have finished updating the required fields, click "Next":
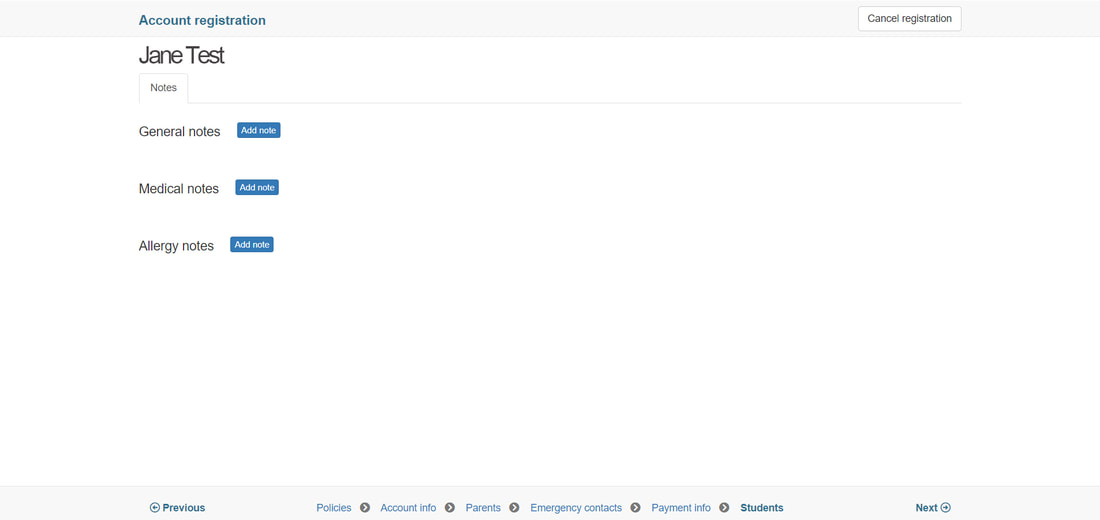
Please enter any General, Medical, or Allergy notes you feel the faculty or staff should be aware of, then click "Next":
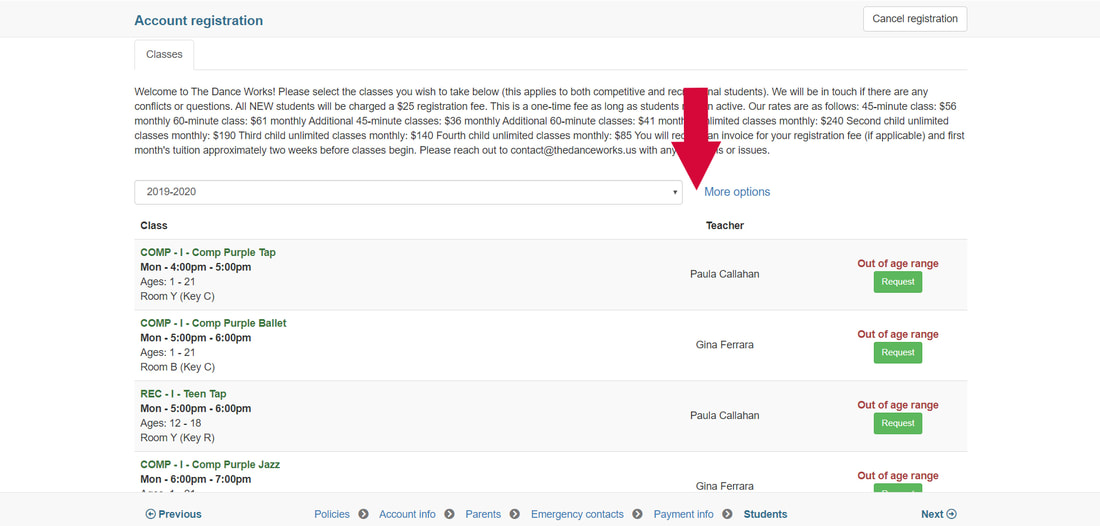
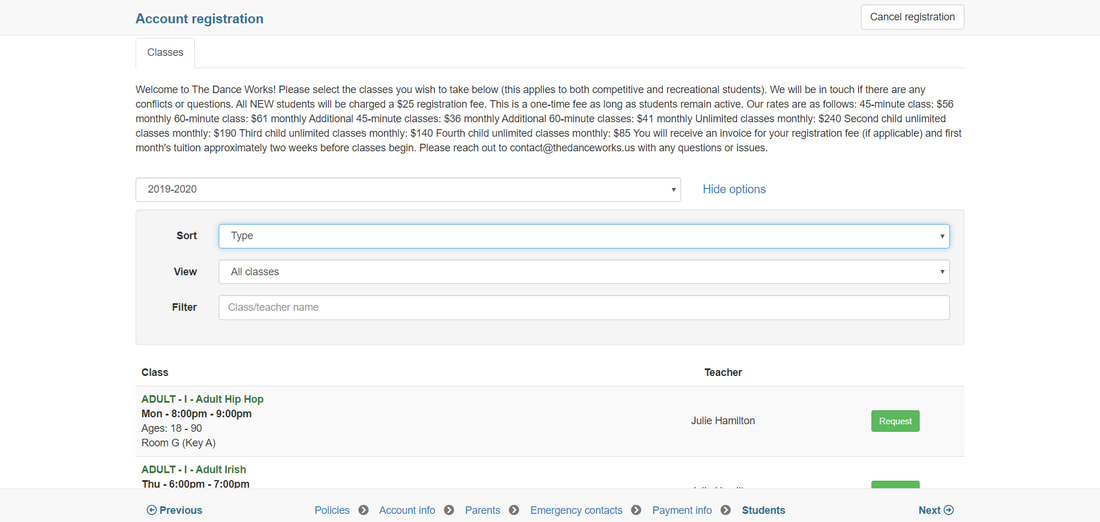
Now you are ready to choose classes for the student you are registering. There is a drop-down for you to choose the appropriate dance year (left of the red arrow). This would be important if you register in the summer, to be sure you distinguish between the summer session and the new fall session. To the right of the red arrow you may click "More options" to choose how to sort the classes to find what you want most easily:
For example, sorting by "Type" gives you an alphabetical list of class types (Adult, Comp, etc.), so you can find all the classes that fall into that type. Click the GREEN "Request" button next to the class you wish to take:
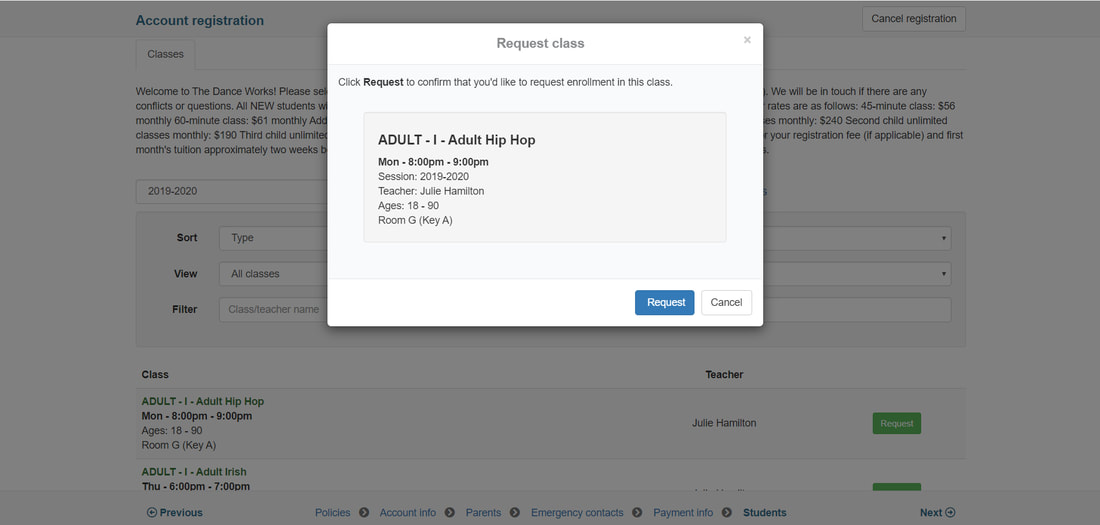
Then confirm by clicking the BLUE "Request" button on the pop-up:
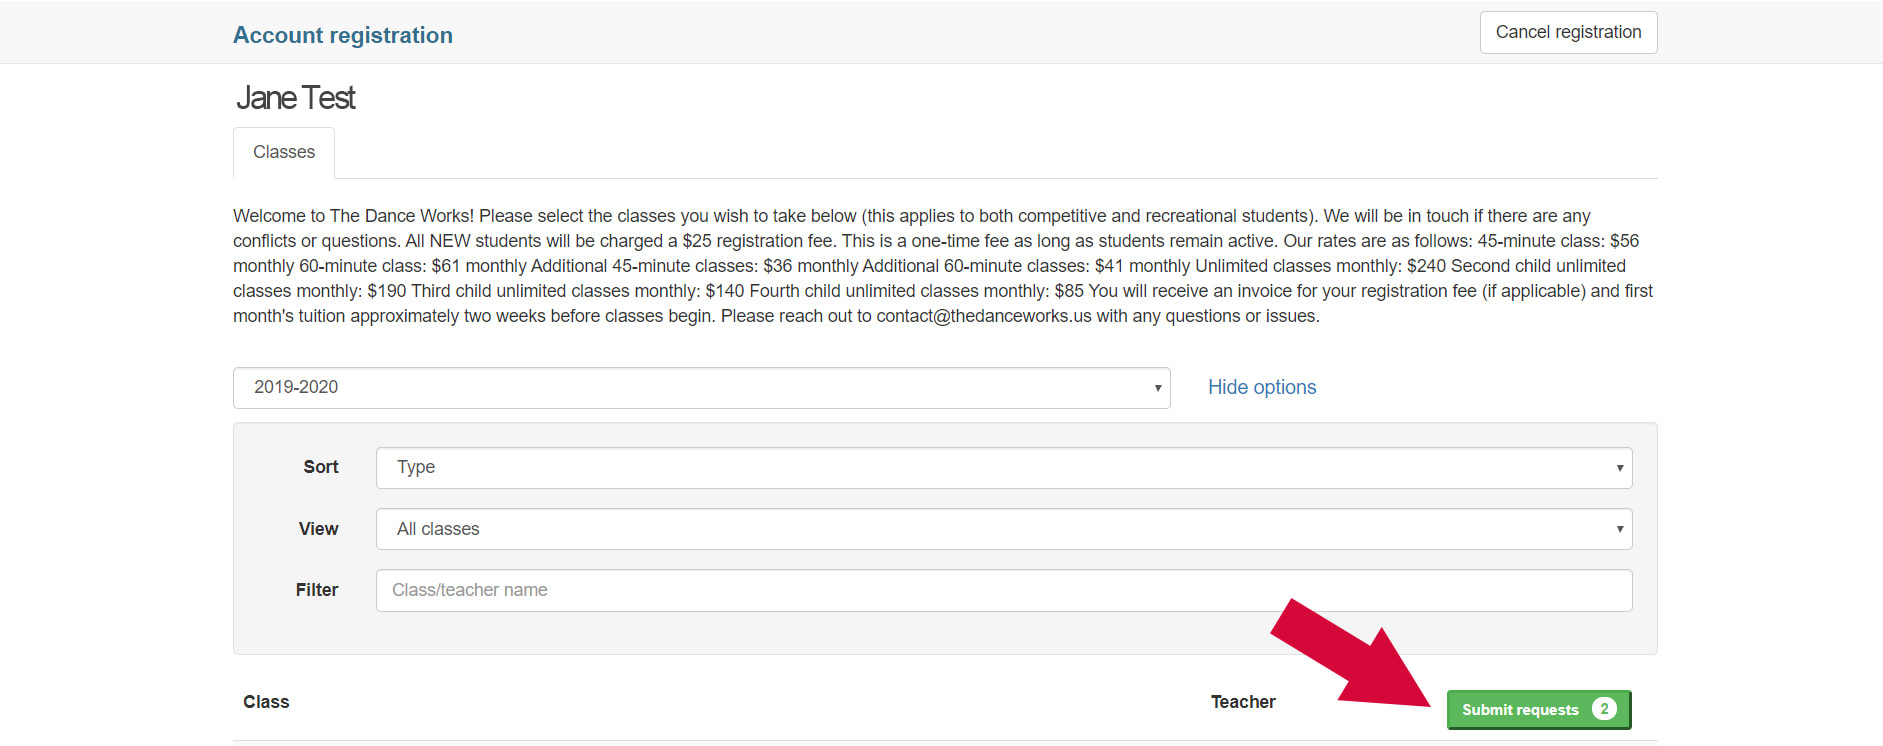
Request and confirm any additional classes you wish to take. When you are finished, click the GREEN "Submit requests" button:
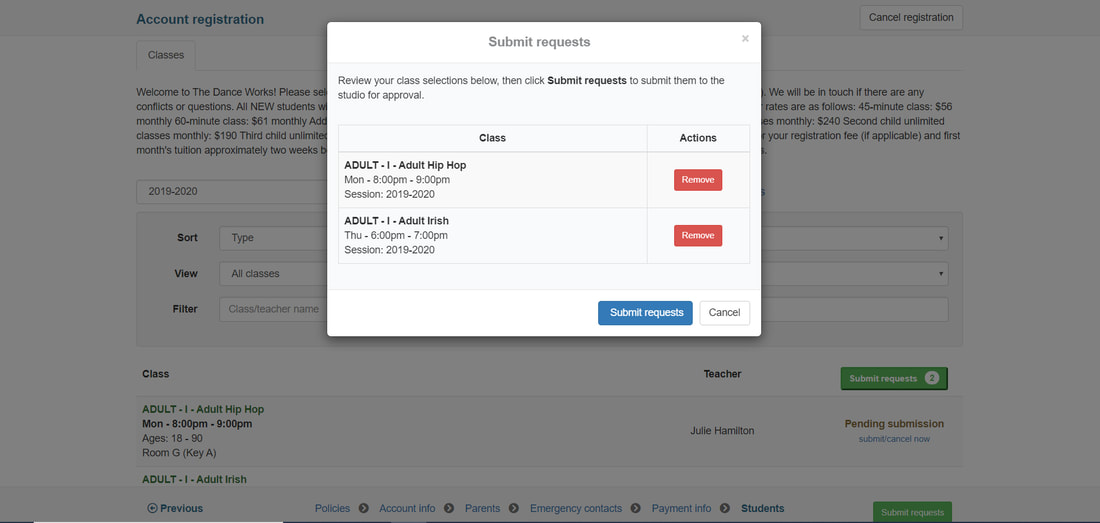
Remove any unwanted classes and confirm by clicking the BLUE "Submit requests" button:
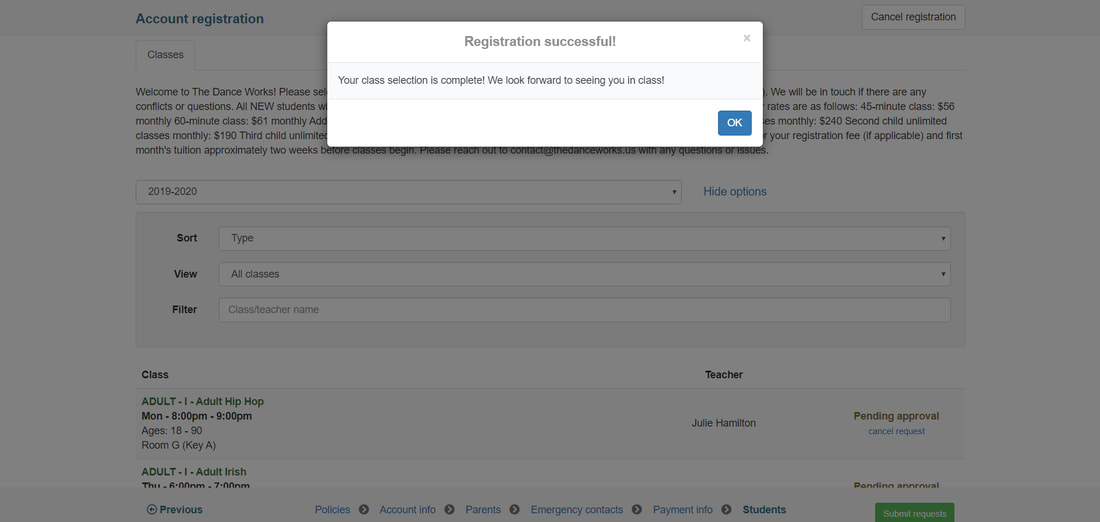
You should see a confirmation that your registration was successful. Click "OK":
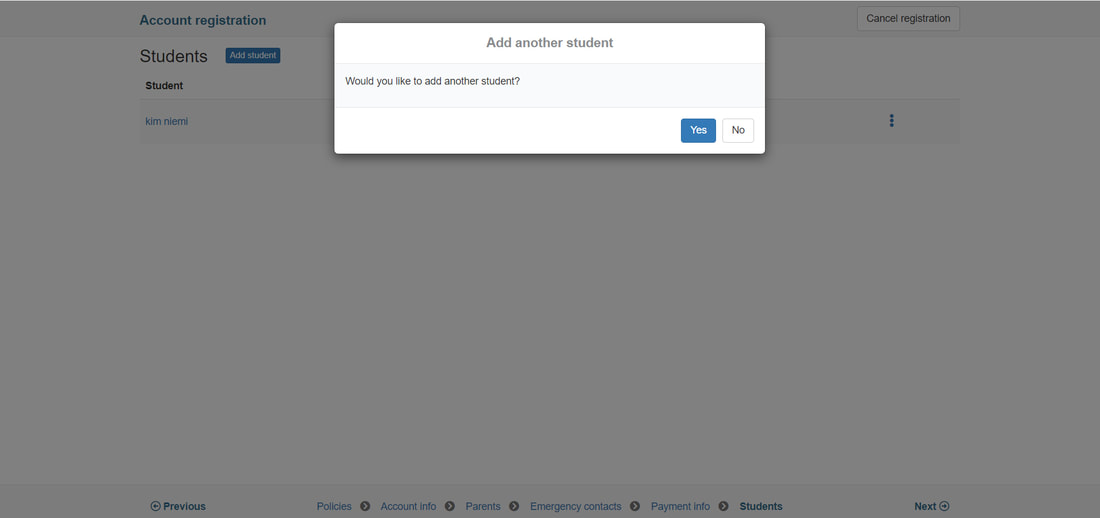
The next pop-up will ask if you'd like to add another student. If so, choose "Yes" and follow the prompts to repeat the steps above. When you are finished registering students, click "No":
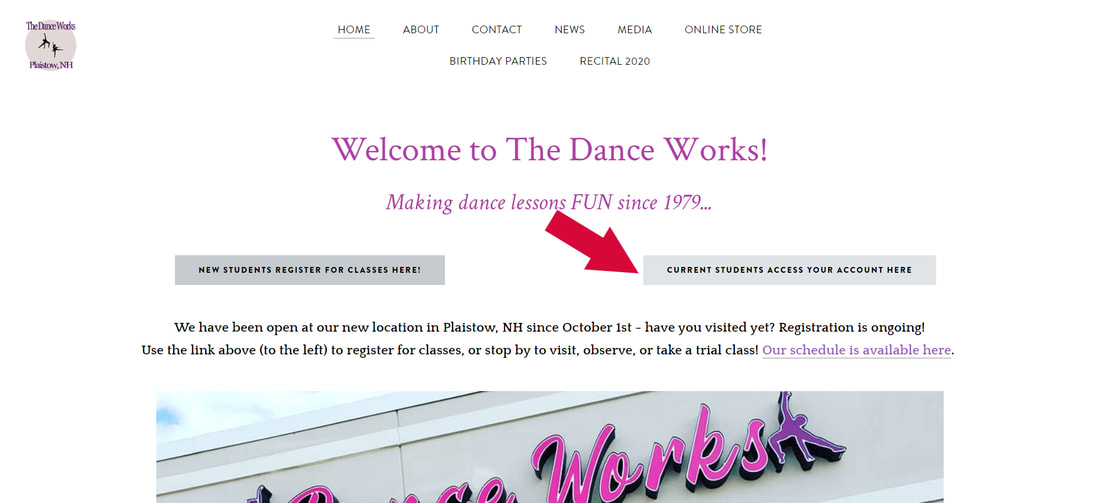
And that's it! Once you've finished adding students and click "No" for the last time, you'll see your home screen, with your account information, a link to click and make a payment (if an invoice has been created), and any studio messages that apply. To access your account in the future, go to the home page of TheDanceWorks.us and click on the link at the top right that says, "Current Students Access Your Account Here." Enter your email and password created during the registration process, and you're in!
You can use Parent Portal at any time to view your classes, invoices, make a payment, and more. If you have any question, feels free to reach out to [email protected] at any time.

